
If you’re feeling a little nervous about picking up your pruning shears for the first time, this guide is for you.
Is the thought of making a wrong cut worrying you? Worry not. Pruning is simple once you know the basic moves.
This guide will help you learn everything about using pruning shears, from preparing the tool to making clean, healthy cuts.
After reading it, all you need is a few snips to build your confidence and take on any plant or tree like a pro.
Let’s dive in.
Why Pruning Matters?
Let’s first talk about the “Why”; although it’s a big plus, pruning isn’t just about making your garden look clean.
It’s also about:
Plant Health: Removing dead, diseased, and damaged branches allows the plant to focus its energy on healthy growth and prevents diseases from spreading.
Encourages Better Growth: Strategic cuts stimulate the plants to produce more flowers and fruits.
Improves Shape and Structure: Pruning prevents overcrowding, allowing air and sunlight to reach the inner parts of plants. This helps them develop strong skeletons.
Step 0: Gearing Up (Pre-Snip Preparation)
Preparation is key to a successful pruning session. Here’s how to do it:
Understanding Your Pruning Shears
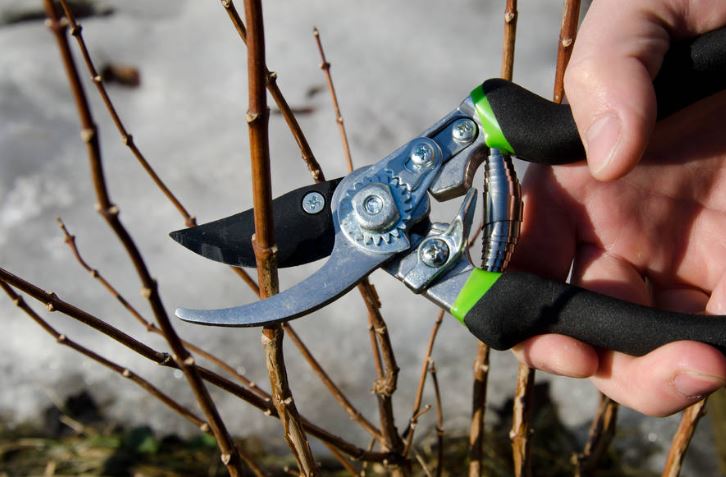
Bypass pruners are the most common. They cut like kitchen scissors, with one blade sliding across the other, allowing you to make crisp, clean cuts.
This makes these pruners ideal for live, green stems.
Anvil Pruners have a flat base and a sharp blade. The blade chops straight down onto this base, making the tool ideal for dead and dry wood.
However, anvil pruners can crush soft, live stems, so stick with bypass pruners unless you have to tackle dry wood.
Sharpen Your Blades
Dull blades can crush stems rather than slicing cleanly, leaving ragged wounds that invite diseases and pests.
Keep your shears sharp. Gently run a sharpening stone across the cutting blade’s beveled edge a few times.
Cleaning is Crucial (Stops Diseases)
Before starting and making cuts between plants, clean and disinfect your pruners with rubbing alcohol or a bleach solution.
Using dirty and infectious blades is the best way to spread diseases from one plant to another.
Protecting Yourself
Pruning shears have sharp blades designed to make clean cuts. Keep your other hand’s fingers out of the cutting zone and use thick gardening gloves.
Step 1: Spot the Target (What Needs to Go)
Next, take a look at your plant, walk around it, and identify the troublemakers. Here’s what to look for:
The Obvious Stuff: Dead branches (Brittle and brown), diseased branches (Discolored and spotted), and damaged ones (Cracked or split).
The Crowded Crew: These are the branches that grow straight into the center of the plant, blocking air and light.
The Shape Spoilers: Branches sticking out awkwardly, ruining the plant’s natural form.
Step 2: Position Your Shears
This is the most important step for a good cut.
Get a Grip: Start with a firm grip on your pruners with the dominant hand. Control the tool with your thumb and forefinger.
Placing the Branch: Position the branch or stem you want to cut inside the open jaws. Keep it close to the pivot point (The hinge where the blades connect).
Blade Orientation (Important): Position the tool so that the cutting blade (The sharper one) is towards the part of the plant you want to keep. This helps you make a clean, healthy cut that encourages further growth.
The thicker blade, which doesn’t do the main cutting, should be towards the part of the plant you want to remove.
Step 3: Making the Cut (Where and How)
How and where you cut affect how your plants heal and regrow.
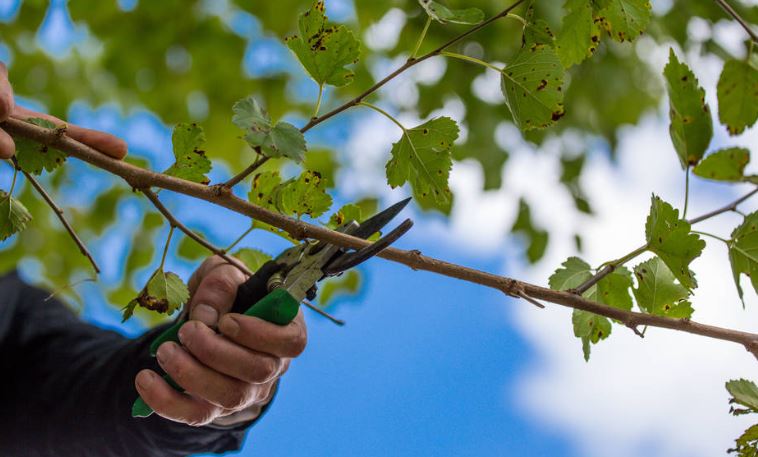
Cutting a Stem Back
Start by finding a healthy bud pointing in the direction you want new growth to go. Make sure the new growth doesn’t crowd the center and grows outward.
Next, tilt your pruners so that the cut is on a slight diagonal (About 45 degrees), sloping down and away from the bud.
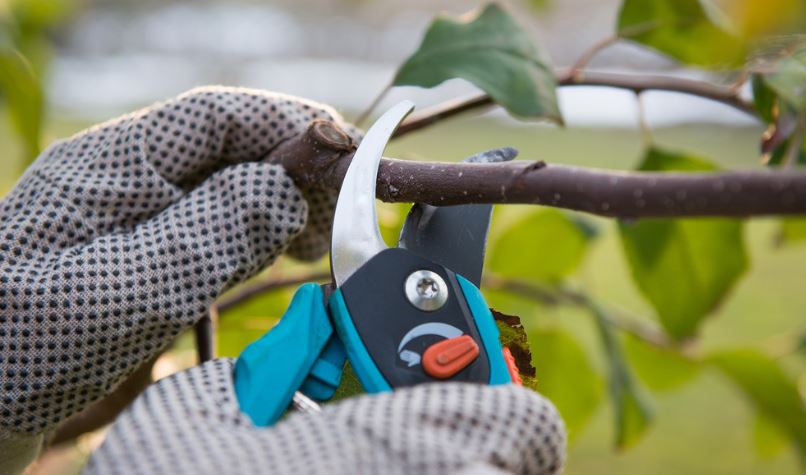
Cutting a Branch
Start by finding the “Branch collar”. Locate the spot where the branch you want to remove connects to the larger branch or trunk.
The branch collar is the slightly swollen part that wraps around the base. Don’t cut it off.
Just above the branch collar, position your pruners and cut the branch cleanly without gouging the trunk/parent branch.
Step 4: Executing the Cut
Once you know where to cut a branch, it’s time for execution.
Smooth Squeeze
Apply firm and steady force on the handles. Avoid jerking, twisting, and forcing it. Let the blades do the heavy lifting.
Listen for the Snip
A clean cut through live wood makes a crisp, satisfying sound. If it requires excessive force, stop right there. You may be using the wrong type of pruners.
Post-Snip Inspection
Make sure the cut surface is smooth. It shouldn’t be ragged or crushed. If it is, you either need to sharpen your blades or change your technique.
Frequently Asked Questions
What is a Pruner Tool Used For?
Pruners trim branches, stems, and woody growth to encourage healthy plant growth. They can cut wood as thick as ¾ inch.
What is the Difference Between Shears and Pruners?
Pruners (Secateurs) are one-handed and are used for precise cuts on stems and branches up to ¾ inch thick. Shears are two-handed and are typically used for soft growth and light shaping.
Do You Need Pruning Shears or Can You Use Scissors?
Scissors can crush stems more easily, whereas pruning shears make cleaner cuts and offer better leverage.
What Can Pruning Shears Cut?
They can easily cut live/dead branches, twigs, and stems up to ¾ inch thick. Use bypass pruners for live, green growth and anvil pruners for dry or dead wood.
Conclusion
Using pruning shears doesn’t have to be complicated. All you need is the right guidance and a little practice to build your confidence.
In a nutshell, here’s how to use pruning shears the right way:
- Choose the right type (Bypass vs. anvil)
- Prepare it properly
- Identify what to cut
- Position your shears perfectly
- Make clean cuts
If you follow these steps carefully, you’ll be well on your way to becoming a pro pruner. Never neglect personal safety; use thick gardening gloves and keep your hands out of the cutting zone.
Read More: Sharpening Pruning Shears (Your Step-by-Step Guide)